3. Step-by-Step Guide
Once you have forked the repository to your GitLab account, you can start creating the .gitlab-ci.yml file and configuring the pipeline stages and jobs. This step-by-step guide will help you create a basic CI/CD pipeline for the “Research Publication Data Analysis” project.
3.1 Create a .gitlab-ci.yml File
First, we need to create a .gitlab-ci.ymlfile. We can create it by using the GitLab UI or Creating it manually.
While you can create the .gitlab-ci.yml file manually, it is often easier to use the GitLab UI to create your first CI/CD pipeline. The UI provides a visual and comprehensive way of creating a pipeline.
In this example, we will take advantage of the GitLab UI to create our first CI/CD pipeline. GitLab provides a visual and comprehensive way of creating it.
-
Pipeline editor: We just need to go to the
Buildthe section in our project and selectPipeline editor.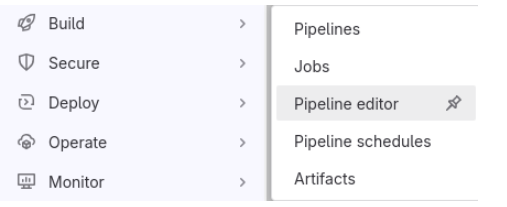
-
Configure pipeline: Click on the
Configure pipelinebutton and GitLab will create a basic pipeline where you can start working.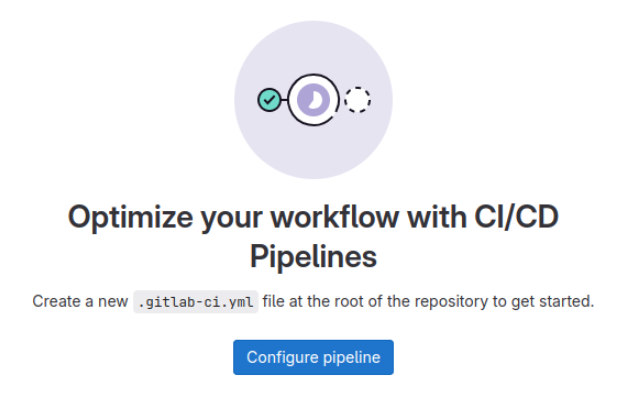
-
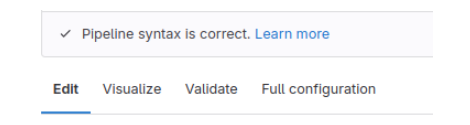
Pipeline sections: The Pipeline editor will have 4 sections:
Edit,Visualize,Validate,Full Configuration.-
Edit: Here you can edit the pipeline, define the stages, and add the jobs, and dependencies… Almost everything you need to define a CI/CD pipeline.
-
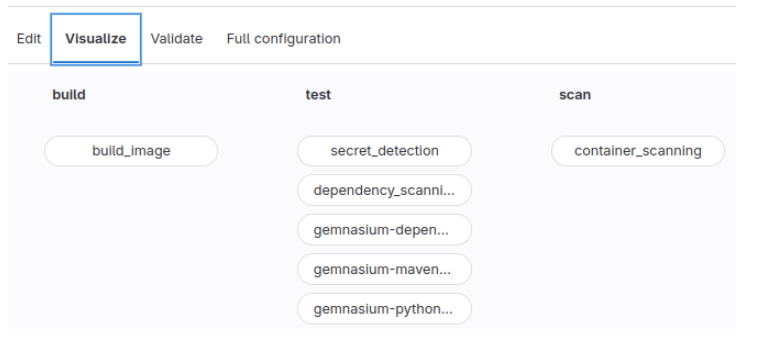
Visualize: Here you can visualize the stages and the jobs organized visually.
-
Validate: Here you can validate your CI/CD before committing the changes to see if the expected output of the pipeline is the correct one or not.
-
Full configuration: Here you can define the advanced configuration of the pipeline. If you do not use it, this is managed by GitLab automatically.
-
3.2 Define the Stages
First, define the stages of your pipeline. Stages are the distinct phases your CI/CD pipeline will go through. Each stage represents a step in delivering your software, from building the code to testing and deploying it.
- Build Stage: This stage is responsible for compiling and preparing the source code for testing.
- Test Stage: This stage runs automated tests to ensure that the code functions correctly.
- Deploy Stage: This stage handles the deployment of the application to the specified environment.
stages:
  - build
  - test
  - deploy
*Note: This is only an example. You can define the necessary stages that you consider for your application. The stages can be named as you want.
3.3 Add Jobs for Each Stage
So, we have already created the GitLab CI/CD pipeline using the Pipeline editor in the GitLab UI and we define the basic stages.
Next, add jobs for each stage. Jobs are the individual tasks that run within a stage. Each job specifies a series of commands (scripts) to be executed.
Continuing with our example, we define jobs for each of the defined stages.
Build Stage
In the build stage, you usually compile the source code and prepare it for testing.
build_job:
  stage: build
  script:
    - echo "Building the application..."
    - pip install -r requirements.txt
    - echo "Build complete"
Test Stage
In the test stage, you run automated tests to ensure the code functions correctly.
test_job:
  stage: test
  script:
    - echo "Running tests..."
    - pytest tests/ # Commands to run your tests, e.g., `pytest tests/`
    - echo "Tests complete"
Deploy Stage
In the deploy stage, you deploy the application to the specified environment. (We will not deploy the application in our example).
deploy_job:
  stage: deploy
  script:
    - echo "Deploying the application..."
    - #scp -r dist/ user@server:/path/to/deploy
    - echo "Deployment complete"
3.4 Add Scripts to Each Job
Each job should contain the necessary scripts to perform its tasks. These scripts are the actual commands that will be run during the pipeline execution.
Example Build Job
In this build job, the application is built by installing python project dependencies and running the build command.
The pip install -r requirements.txt command installs the necessary Python packages defined in the requirements.txt file and python setup.py build compiles the Python application.
build_job:
  stage: build
  script:
    - echo "Building the application..."
    - pip install -r requirements.txt # Installs the necessary requirements for our python application
    - python setup.py build # Builds the application
Example Test Job
In this test job, the application’s tests are executed to verify its functionality.
test_job:
  stage: test
  script:
    - echo "Running tests..."
    - python -m unittest discover # Runs the tests using unittest package
Example Deploy Job
In this deploy job, the built application is copied to a deployment server (As we mentioned before, we are not deploying the application in our example).
deploy_job:
  stage: deploy
  script:
    - echo "Deploying the application..."
    - scp -r dist/ user@server:/path/to/deploy
3.5 Add Dependencies (Optional)
If certain jobs depend on the output of others, you can define dependencies. This ensures that jobs are executed in the correct order.
test_job:
  stage: test
  script:
    - echo "Running tests..."
    - python -m unittest discover
  dependencies:
    - build_job # This defines that in order to run the 'test_job' first 'build_job' needs to be run
3.6 Define Artifacts (Optional)
Artifacts are files generated by jobs that can be passed to subsequent jobs. This is useful for sharing build outputs between jobs.
build_job:
  stage: build
  script:
    - pip install -r requirements.txt
    - python setup.py build
  artifacts:
    paths:
      - dist/  # Artifacts generated by this job are stored in this directory